반응형
개요
istio 설치 방법은 2가지가 있다.
- istioctl CLI 명령어 설치 방법 (추천)
- istio-operator.yaml 설치 방법
istio 설치 메뉴얼 : https://istio.io/latest/docs/setup/getting-started/#bookinfo
1. istioctl 설치
- istioctl CLI 명령어를 설치합니다.
curl -sL https://istio.io/downloadIstioctl | sh -
cp ~/.istioctl/bin/istioctl ~/bin

istioctl version
- MAC OS istioctl 명령어 설치
brew install istioctl

istioctl version
client version: 1.15.2
control plane version: 1.14.1
data plane version: 1.14.1 (21 proxies)
2. istio-system 설치
- istio-operator.yaml 생성
- istio-operator 옵션 링크 :
apiVersion: install.istio.io/v1alpha1
kind: IstioOperator
metadata:
  namespace: istio-system
  name: istiocontrolplane
spec:
  profile: default
  tag: 1.15.2
  values:
    gateways:
      istio-ingressgateway:
        type: ClusterIP
    global:
      proxy:
        resources:
          limits:
            cpu: 6000m
            memory: 4024Mi
          requests:
            cpu: 100m
            memory: 128Mi
      proxy_init:
        image: proxyv2
        resources:
          limits:
            cpu: 6000m
            memory: 4024Mi
          requests:
            cpu: 10m
            memory: 10Mi
  components:
  meshConfig:
    accessLogFile: ""
    ingressGateways:
      - name: istio-ingressgateway
        tag: 1.15.2
        enabled: true
        k8s:
          service:
            type: ClusterIP
          hpaSpec:
            minReplicas: 5
  meshConfig:
    #accessLogFile: /dev/stdout
    accessLogFile: ""
    extensionProviders:
      - name: oauth2-proxy
        envoyExtAuthzHttp:
          service: oauth2-proxy.infra.svc.cluster.local
          port: 80
          timeout: 1.5s
          includeHeadersInCheck: [ "authorization", "cookie" ]
          headersToUpstreamOnAllow: [ "x-forwarded-access-token", "authorization", "path", "x-auth-request-user", "x-auth-request-email", "x-auth-request-access-token" ]
          headersToDownstreamOnDeny: [ "content-type", "set-cookie" ]
- istio-system 설치
istioctl install -f operator.yaml -n istio-system

This will install the Istio 1.15.2 default profile with ["Istio core" "Istiod" "Ingress gateways"] components into the cluster. Proceed? (y/N) y
✔ Istio core installed
✔ Istiod installed
✔ Ingress gateways installed
✔ Installation complete
Making this installation the default for injection and validation.
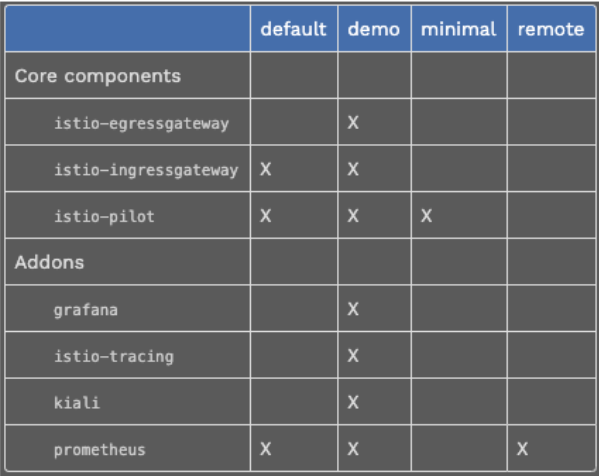
- profile 정보
- 링크 : https://istio.io/latest/docs/setup/additional-setup/config-profiles/
- istioctl 설치할 때 yaml 지정하지 않고 설치할 Profile을 지정해서 설치할 수 있다.
- ex) $ istioctl install --set profile=demo -y
3. istio 설치 확인
- istio 설치 확인
kubectl get all -n istio-system
kubectl get istiooperators -n istio-system
4. istio-injection 설정
istio-injection를 NameSpace에 설정하면,
해당 NameSpace에 생성되는 pod은 "istio-envoy(proxy)" sidecar가 자동으로 설치된다.
injection 설정하기 전에 배포된 pod은 재배포해야지 "istio-envoy(proxy)"가 설치된다.
- istio-injection 설정
# namespace에 label 설정
kubectl label namespace 네임스페이스명 istio-injection=enabled

ex) kubectl label namespace default istio-injection=enabled
ex) kubectl label namespace infra istio-injection=enabled
- istio-injection label 설정 확인
# label 설정 확인

kubectl describe namespace {{namespace명}}

Name:         default
Labels:       istio-injection=enabled
              kubernetes.io/metadata.name=default
Annotations:  <none>
Status:       Active
kubectl get ns -L istio-injection
NAME STATUS AGE ISTIO-INJECTION
default Active 22h enabled
infra Active 15h enabledistioctl analyze
- istio-injection 설정이 되었는지 pod 상태 확인
- injection 설정 후 pod를 배포하면 2/2으로 표시된다. istio-proxy(envoy) 설치가 된상태
- istio-injection 설정하기 전에 배포된 pod은 재배포가 필요하다.
- 기존에 운영 중인 pod는 1/1으로 보인다. (injection 설정 후 pod 재배포 필요)
kubectl get pod -n dw
NAME                                    READY   STATUS    RESTARTS   AGE
pod/nginx-deployment-57b9667479-hjcpc   2/2     Running   0          10s
pod/nginx-v0.2-66c9969fcc-wfcbr         2/2     Running   0          10s


kubectl  describe pod/nginx-v0.2-66c9969fcc-wfcbr -n dw
Containers:
  istio-proxy:            # istio-proxy container
    Container ID:  docker://xxx
    Image:         docker.io/istio/proxyv2:1.14.1
    Image ID:      docker-pullable://istio/proxyv2@sha256:xxx
    Port:          15090/TCP
    Host Port:     0/TCP
... 이하 생략
  web:                   # service container
    Container ID:   xxx
    Image:          xxx
    Image ID:       xxx
    Port:           80/TCP
...이하 생략
반응형
'인프라 > 시스템 구축' 카테고리의 다른 글
| [ EKS ] Configmap - 2 (0) | 2023.04.19 |
|---|---|
| [ EKS ] Nginx-Ingress (0) | 2023.04.18 |
| [ istio ] istio 이란? (0) | 2023.04.13 |
| [ EKS ] karpenter (0) | 2023.04.06 |
| [ EKS ] ClusterAutoscaler (CA) (0) | 2023.04.06 |